Three Cheese Macaroni

Comfort Food: Lasagna

BBQ Grilled Cheese

Pork Sandwiches

Showing posts with label Breakfast. Show all posts

Maple Apple Breakfast Bake

Wednesday, October 30, 2013


I'm always looking for ways to recreate breakfast with something exciting and easy to make. I tend to take breakfast pretty seriously, since dairy farming and child raising seem to use up a lot of energy.

In order to make breakfast easy on myself, I tend to keep certain food items on hand: croissants, frozen fruit, maple syrup, etc. I can whip together a great egg bake the night before and either slow cook or bake it the next morning. There is nothing more comforting than a warm breakfast waiting for you after milking cows for three hours. Nothing. Well, maybe a hot bath. Yes, I went there.

I've come up with a new creation that uses up some apples from our orchard and some great maple syrup (grade B is my favorite). No other sugar is necessary. This dish will warm you up and get you rip roarin' for your day. Are you ready!? Be sure to read through to the end, I have a great suggestion you won't want to miss.

Want to learn more about 'real' maple syrup? Be sure to check out Pure Canadian Maple Syrup for more recipes, how maple syrup is made and explanations of the grading process.

Maple Apple Breakfast Bake

Ingredients
6 large croissants, cubed
6 oz cream cheese, cut into cubes
2 large apples, sliced
8 eggs, beaten
1 1/2 cups heavy cream
1/4 cup butter, melted
1/4 cup maple syrup, plus more for serving

Directions
Grease a 6.5 qt slow cooker dish and place half of the croissant cubes inside. Evenly drop the cream cheese and half of the apple slices over the croissants. Top with remaining croissant cubes and apple slices.

Combine the eggs, milk, maple syrup and butter in a large glass measuring cup and pour over bread mixture.

Cover slow cooker dish and bake on high for 2 hours, or until browned and no longer jiggles.

Serve with additional maple syrup as a topping. This dish can be prepared the evening prior and baked before serving.

*Leftovers can be served with ice cream as a dessert or blended in a mixer with ice cream as a maple-apple shake with an additional 2 Tablespoons of maple syrup. I'm salivating just typing this.

Pre Game Warm Up: Mixed Berry Popovers

Saturday, September 28, 2013


We're one of those crazy families that owns season tickets for the Golden Gopher football team (that's the University of Minnesota if you weren't sure). My daughter decided to to wake up at 5:30 this morning, so I had some time to make a good breakfast before we headed out for the two hour drive. 
I completely changed a recipe into my own, because it had whole wheat flour with awful texture (for popovers). I don't mind whole wheat on a normal basis - just to be clear. I also happen to not have half of the original ingredients, so I had to improvise. Thank goodness- they're so much better now! My daughter and husband approved. 

Mixed Berry Popovers
Makes 11-12 popovers

1 cup sour cream
Zest of one lemon
2 tablespoons water
2 eggs
1 teaspoon vanilla
1 teaspoon baking soda
2 tablespoons brown sugar
Dash of cinnamon
1 cup cake flour
1/2 cup mixed berries (raw or frozen)
2 tablespoons butter

Directions

Preheat oven to 450*F. 
Place sour cream, water, eggs, and vanilla in a blender. Blend until combined. 
Add baking soda, brown sugar, cinnamon and flour. Blend until frothy and bubbly, then let sit for 10 minutes. 
In the meantime, place a muffin tin in the oven and heat for about 3-5 minutes. Once heated, brush the butter into the muffin tin with melted butter using a pastry brush. 
After mixture has rested, blend once more. Pour into muffin tin, filling about 3/4 full. Sprinkle each popover with a few berries. 
Bake for about 10 minutes, without opening the oven, reduce heat to 350*F and bake another 8-10 minutes (mine took 8), or until pancakes are puffy. 
Dust with powdered sugar and serve immediately, using caution with the hot berries. 


Sinful Muffins and a Prayer

Monday, September 2, 2013


I have this great-aunt that is a fabulous cook. Her and her husband used to run a bed and breakfast not far from home. My girlfriends and I had the chance to stay there last spring before they had to close shop - and I'm so glad we had the opportunity! The place was full of my family history including a book full of love notes between my great grandma and grandpa. It was very sweet and quaint.

My great-aunt again has cancer and is now in the middle of fighting. I am appreciative of my great-uncle's CaringBridge journal as we are able to keep up with how she's progressing. I kept trying to think of something I could do to help or a special way to pray for her and I could only think of one thing: food.
She has a cookbook that was made for the bed and breakfast and it's full of stories and great recipes (many of which were made during our stay last spring). Our families were dairy farmers, so the butter and cream are not skimped out. I love it.

I decided that I would start to cook out of her recipe book in honor of her and hope that the extra positive vibes would be sent her way. The muffins I made are called Sinful Muffins - which seems a little backwards in terms of the prayer I'm trying to achieve, but they're so dang good. I can understand why they got their name.

Sinful Muffins

by Aggie

3 cup flour
3 tsp. baking powder
3/4 tsp. salt
1 tsp. soda
1 cup sugar
2/3 cup vegetable oil
1 cup orange juice
2/3 cup chocolate chips
One, 11oz can mandarin oranges, drained
2 eggs

Topping
1 cup shredded coconut
1/3 cup white sugar
2 tbsp. melted butter

Mix sugar and oil, beat in eggs, add orange juice, chips, mandarin oranges. Mix dry ingredients, gradually add to liquid mixture, stir just until blended.
Ice cream scoop batter into muffin paper lined muffin tins. Preheat oven to 375*. Mix topping ingredients and sprinkle on muffin batter. Bake for 15-20 minutes until golden brown.

Makes 2 dozen delicious muffins.


Peaches and Cream Pancakes

Tuesday, July 16, 2013


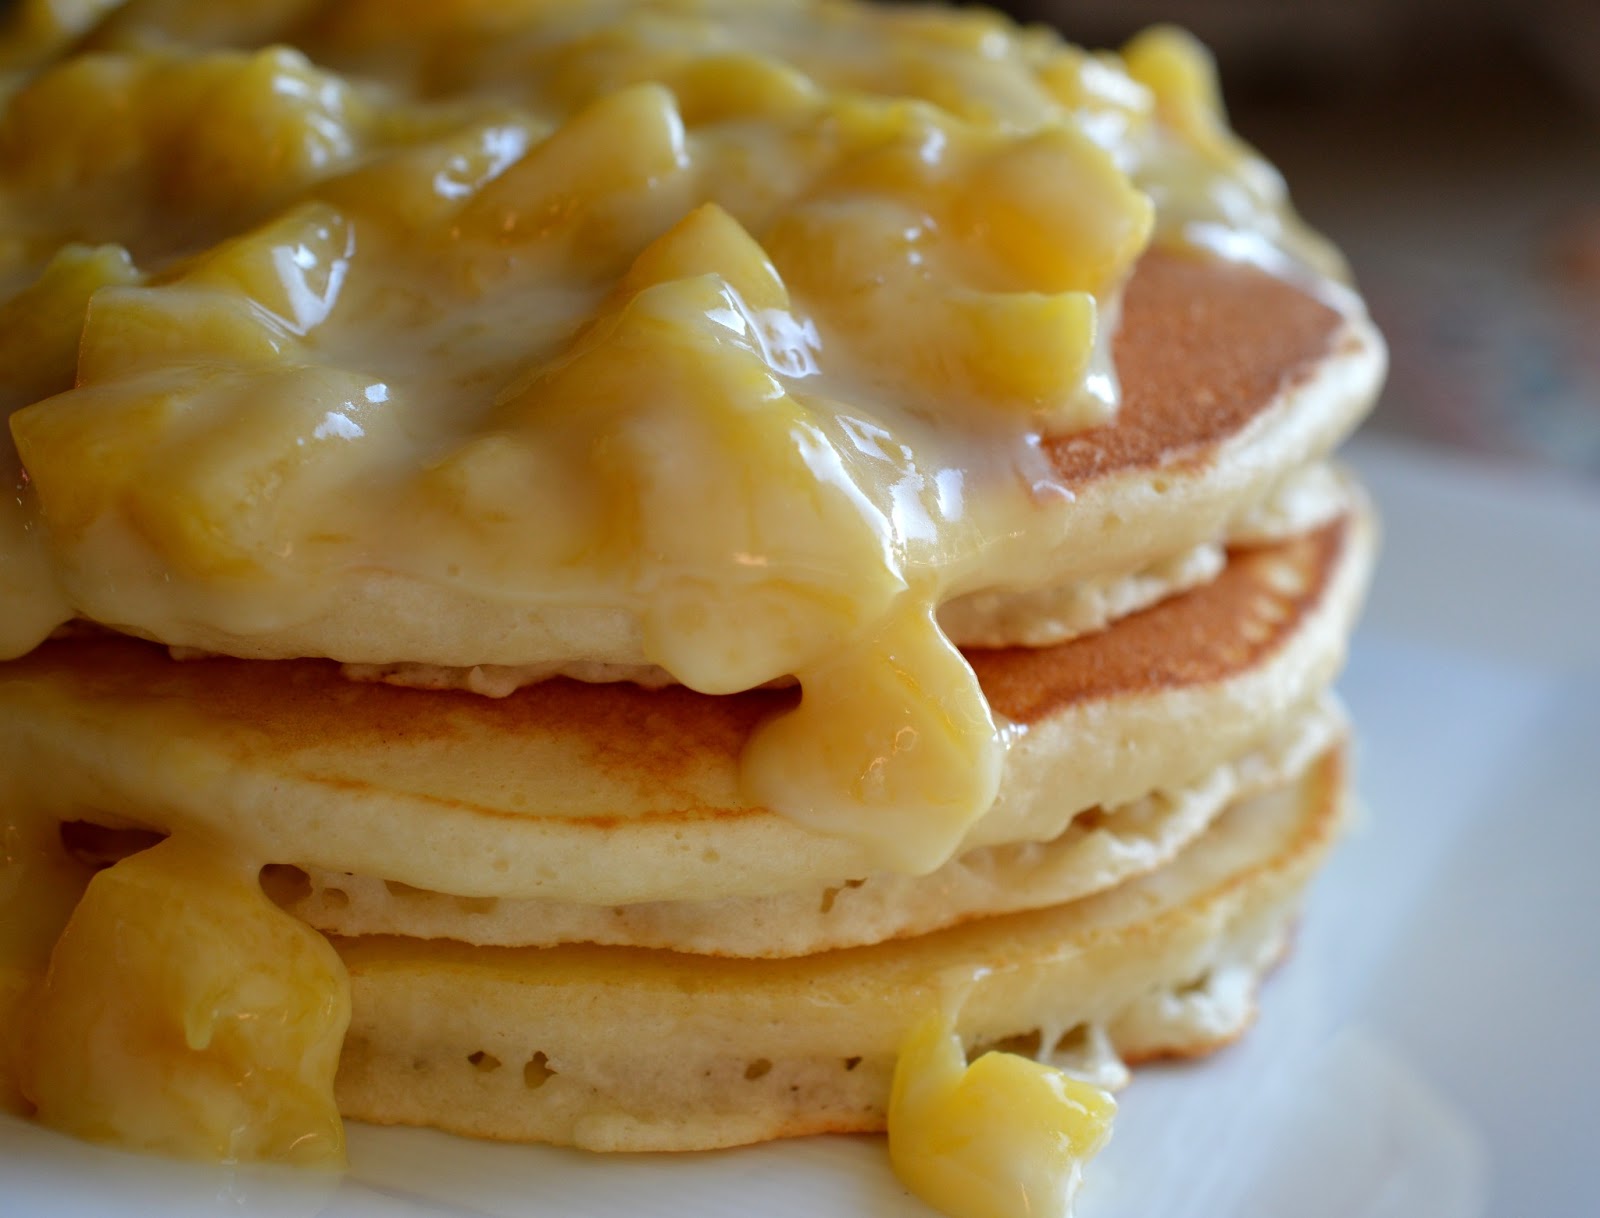
I have this newly renewed love for pancakes. I've always really enjoyed them, but now that my daughter loves them - it's that much more enticing to make golden stacks of delicious pancakes.

I cheated though... I used the store-brand version of Bisquick. My Vermont slow-food friends would gasp. But guess what? I'm learning why moms need quick, easy to make foods for their kids. They'd gasp again when they find out that I didn't top them with pure Vermont maple syrup. I think I've just run out of my supply since we've moved from there over two years ago (hint to my Vermont friends).

Instead, I decided to continue using up my bushel of peaches that I bought last week. They're ripe and the aroma in my fridge is quite awesome. As soon as I dropped some of the peaches and cream on my daughters pancake, she completely devoured it all. No joke. And... I may have eaten a 3-stack after taking these pictures. Let's just say that I ate a late lunch.

Peaches and Cream Topping

Tops 2-3 pancake stacks
1 peach, peeled and diced
1 T. sugar
1/4 c. water
4 T. mascarpone

Combine the diced peach, sugar and water in a small sauce pan over medium heat. Let cook for about 5-10 minutes or until water is nearly dissolved.

Take off heat and add mascarpone. Stir until fully incorporated.

Top pancakes and eat while still warm.

Is the rhubarb ready?

Thursday, June 6, 2013


I met my neighbor at the mailbox last week asking her the above question. 'Yes! Please, take some!' - was her response. Her mother planted rhubarb years ago in order to 'pay off' the road grater (we live on gravel roads) and other [useful] service folks. Now - there's enough to go around for the entire neighborhood. Luckily, I've grown fond of rhubarb and have learned of various ways to bake with it. The best recipe, being this one. It literally takes 6 minutes. In the microwave. No joke. Put it on a Biscoff cookie with some mascarpone... holy buckets. (Great - after going to the Biscoff site, I find that they're on sale. I'm doomed.)

Being it's June Dairy Month and me not in the mood to bake, I made some smoothies. My daughter loved it. So much that she sat in her highchair with her mouth open until I'd give her another slurp. I'll be honest though, I gave her the non-gingered-rhubarb-compote version to avoid giving her all of that extra sugar. I'm a nut case.

Smoothie for a Neighbor

Serves 4-5

1 large banana, peeled and cut into chunks,
6-7 large strawberries, hulled and cut in half
1 peach, pitted and quartered
1/4 cup gingered rhubarb compote (click for recipe)
12 oz Greek yogurt, any flavor
1/4 cup milk

In a blender, combine all ingredients. For a thicker smoothie, add less milk - for runny smoothies, add more milk (crazy how that works). Blend until fully combined and pour into a glass. Serve cold with sliced strawberries.

You can really add any fruit you'd like. Some people even add vegetables. Maybe I'll be daring and give that a try some day.

My Breakfast Phase

Wednesday, March 6, 2013

*Update - this recipe won me ice cream for a year from Sassy Cow Creamery in Columbus, Wisconsin. Yay for ice cream!


I've been on this breakfast kick lately and I just can't get enough of it. There's something about waking up in the morning to the smell of coffee brewing and either oatmeal in the crock-pot or something in the fridge that can be baked in the next half hour. I'll include the oatmeal recipe soon - it's not perfected yet.
I have perfected this recipe though - or so I think. I've made it so many times that my husband automatically checks the oven when he comes in from milking cows in the morning. He's somewhat disappointed if there's nothing there. I'll need to find a new recipe to try.

My dad wasn't quite convinced of this 'sweet' version, so I made a savory one for him this morning (included below). My mom is wanting the recipe so she can make it herself. Though I haven't minded having someone to share it with to avoid too many leftovers. It's pretty good re-heated, but not everyone can enjoy leftovers.
So what should I try next? My only requirement is that it has to be able to be prepared the night before.


Strawberry, Banana and Croissant Breakfast Bake


4-6 medium croissants, cut in half
2 bananas, sliced
1/2 cup strawberry preserves
1/2 cup whole milk
1/2 cup heavy cream
1/4 cup sugar or honey
4 eggs, beaten

In an 8×8 square baking dish, evenly place bottom halves of croissants, face down. Next, spread around the banana slices over the croissant halves. Top the banana slices with spread-out dollops of strawberry preserves.

In a glass measuring bowl, whisk together the milk, cream, sugar and eggs. Pour half of the mixture over the croissant/banana/preserves. Top with the remaining croissant halves, round side up. Evenly cover with remaining egg mixture.

Cover dish with plastic wrap and refrigerate for at least one hour, up to overnight. *I make it the night before so it’s ready for breakfast the next morning.

Preheat oven to 350 degrees F. Place dish in oven and bake for about 30-35 minutes. It should no longer jiggle.

Serve warm.

Savory Version: 


Use the same recipe above, but do not add strawberry preserves, sliced bananas and sugar. Instead, use cooked sausage and shredded cheese. I used about 6 diced sausage links and about 1/2 cup shredded Pecorino Romano cheese. You could use any kind of cheese you like as well as any type of sausage (Italian would be tasty).

Bread Even You Can Make

Tuesday, March 5, 2013


Who wants fresh baked bread for breakfast in the morning?! I found this bread recipe on Pinterest and was talking it up to my mom yesterday. She's like 'yeah, that's the bread I made for you last week'. Der. I was even the one that emailed her the recipe. I may or may not read all of the recipes I forward to her. I think she's figured that out now. I'm more of a picture person. If it looks good, I'll figure out how to make it.

I will not claim that this is my own recipe, though it's so freaken easy, you won't even need a recipe the second or third time you make it. There are a million different flavors you could make with it too. My next try will be cinnamon/raisin. I can't wait. Seriously - know how much you hate kneading dough? You don't have to do that to this bread. Know how you hate waiting for it to rise? Well, you still have to wait, but you can let it sit overnight and not think about it. I'm all about the 'letting it sit overnight' strategy. 

Below is the recipe and here is where I got it from. Be sure to check out where I got it from, because she goes into details and also includes many flavor options.

Crusty Bread

3 cups unbleached all purpose flour
1 3/4 teaspoons salt
1/2 teaspoon yeast
1 1/2 cups water

In a large mixing bowl, whisk together flour, salt and yeast. Add water and mix until a shaggy mixture forms. Cover bowl with plastic wrap and set aside for 12 - 18 hours. Overnight works great. Heat oven to 450 degrees. When the oven has reached 450 degrees place a cast iron pot with a lid in the oven and heat the pot for 30 minutes. Meanwhile, pour dough onto a heavily floured surface and shape into a ball. Cover with plastic wrap and let set while the pot is heating. Remove hot pot from the oven and drop in the dough. Cover and return to oven for 30 minutes. After 30 minutes remove the lid and bake an additional 15 minutes. Remove bread from oven and place on a cooling rack to cool.

Parmigiano Reggiano Chicken and Waffles

Friday, September 21, 2012


If you're obsessed with watching cooking channels, you'll totally know what I'm talking about here. If not, this might be a new concept. It's chicken and waffles. Together. Married together with sweet, sticky honey.
It's delicious.

I was sold when dining out in North Carolina and got served this giant Belgian waffle with two pieces of perfectly crusted chicken and honey on the side. The girl across the table from me was like 'OMG - I could never eat all of that'. My pregnant-self said to self 'watch me'. And yes, I ate the whole meal and it was wonderful. My husband was impressed. At least - I think he was?

My urge to recreate this masterpiece has been intense lately and well, I had to find a way to incorporate cheese. Because I always need to find a way to incorporate cheese into my dishes. It took a little tweaking, but I got it. I got it good.


The trick? Finely grated Parmigiano Reggiano. Lots of it. It adds a saltiness and a savory edge to the waffles. And the chicken? Who doesn't love deep-fried chicken? With cheese.

I'll stop writing now and get to the goodness:

Parmigiano Reggiano Crusted Deep-Fried Chicken

Serves 2

1 pound chicken drumsticks and wings, skin on

2 cups buttermilk
1/2 cup shredded Parmigiano Reggiano cheese
3/4 cup all-purpose flour
1 tablespoon Italian seasoning
1/4 teaspoon black pepper
2 eggs, beaten
3-5 cups vegetable or peanut oil, for frying

In a large saucepan, place chicken and cover with milk. Over medium-high heat, bring milk to a boil, then lower heat to a medium-low. Simmer the milk until the chicken is cooked through entirely, about 30 minutes. Once cooked through, transfer chicken to a cooling rack and allow to cool for about 15-20 minutes. Pat dry using a paper towel.

While waiting for chicken to cool, heat the vegetable oil in either a deep fryer or Dutch oven on high heat to about 325*F.

Combine shredded Parmigiano Reggiano cheese, flour, Italian seasoning and black pepper in a large zip bag. Have the 2 beaten eggs in a medium bowl, set aside.

Place the pieces of chicken in the bag, close and shake until the chicken is completely coated (this is where kids can help). Dip the coated chicken into the beaten eggs, one at a time. Place the chicken back into the dry mixture and shake for one last coating.

Carefully place each piece of chicken into the 325*F oil and fry until the crust turns golden in color, about 1 minute per side. Remove from oil and place on the cooling rack, lined with a paper towel.

Serve hot.


Whole Wheat Parmigiano Reggiano Waffles

Makes about 6, 8-inch waffles

1 cup all-purpose flour
1 cup whole wheat flour
1 cup finely grated Parmigiano Reggiano
1/2 teaspoon baking soda
1 teaspoon baking powder
1/2 teaspoon salt
1/2 teaspoon black pepper
2 tablespoons sugar
3 eggs, separated
2 tablespoons butter, melted
2 cups buttermilk, room temperature

In a large bowl, combine all of the dry ingredients and mix until fully combined. In a second medium-size bowl, beat together the egg yolks, melted butter and buttermilk until well blended. Combine the two mixtures and stir just until combined. Do not over mix!

In a third bowl, beat egg whites until they form medium stiff peaks. Gently fold into the waffle mixture. Trust me, this part is worth it.

Turn on your waffle iron to a medium-high heat. Coat the inside with butter.

Once the waffle iron is ready, pour about 3/4 cup of the waffle mixture in and close. Wait patiently for your fluffy waffle to cook.

If preparing in advance, have your oven set to 200*F and place cooked waffles on a cookie sheet in the oven. Not only will they crisp up a little more, but they'll be warm.

Serve with Parmigiano Reggiano Crusted Chicken Drummies drizzled with buckwheat honey.

BB Biscuits

Thursday, February 2, 2012


I must admit. It's been a terribly long time since I've participated in the Daring Bakers and I started to feel some sort of withdrawal. No joke. Audax Artifex was our January 2012 Daring Bakers’ host. Aud worked tirelessly to master light and fluffy scones (a/k/a biscuits) to help us create delicious and perfect batches in our own kitchens! His recipe is awesome. It's the perfect size for 2-4 people to enjoy fresh, homemade biscuits in about 20 minutes (I made them big). If you're like me, it might be enough for one person. 

As expected, I changed up the recipe a little so that I could use up some fresh fruit I had around. Ripe bananas are not a thing to waste, after-all. Below is Aud's recipe and mine is to follow. I incorporated one very ripe banana with about 1/2 cup blueberries to the mixture. Since I was adding in moisture with the banana, I used half the butter and I cut the milk in half to start. If the mixture seemed dry, I just added a little more milk until it seemed right. I would recommend adding about 1 tsp. of vanilla to the milk mixture. This will bring out the flavor of the banana and blueberries. I baked my biscuits right in a small (6-inch) cast iron pan. This way, I can bring the biscuits right to the table and serve them hot.

Basic Scones (a.k.a. Basic Biscuits)
created by: Audax Artifex
Servings: about eight 2-inch (5 cm) scones or five 3-inch (7½ cm) scones
Can be doubled

Ingredients
1 cup (240 ml) (140 gm/5 oz) plain (all-purpose) flour
2 teaspoons (10 ml) (10 gm) (1/3 oz) fresh baking powder
¼ teaspoon (1¼ ml) (1½ gm) salt
2 tablespoons (30 gm/1 oz) frozen grated butter (or a
combination of lard and butter)
Approximately ½ cup (120 ml) cold milk
Optional 1 tablespoon milk, for glazing the tops of the scones


Directions
1. Preheat oven to very hot 475°F/240°C/gas mark 9.

2. Triple sift the dry ingredients into a large bowl. (If your room temperature is very hot refrigerate the sifted ingredients until cold.)

3. Rub the frozen grated butter (or combination of fats) into the dry ingredients until it resembles very coarse bread crumbs with some pea-sized pieces if you want flaky scones or until it resembles coarse beach sand if you want tender scones.

4. Add nearly all of the liquid at once into the rubbed-in flour/fat mixture and mix until it just forms a sticky dough (add the remaining liquid if needed). The wetter the dough the lighter the scones (biscuits) will be!

5. Turn the dough out onto a lightly floured board, lightly flour the top of the dough. To achieve an even homogeneous crumb to your scones knead very gently about 4 or 5 times (do not press too firmly) the dough until it is smooth. To achieve a layered effect in your scones knead very gently once (do not press too firmly) then fold and turn the kneaded dough about 3 or 4 times until the dough has formed a smooth texture. (Use a floured plastic scraper to help you knead and/or fold and turn the dough if you wish.)

6. Pat or roll out the dough into a 6 inch by 4 inch rectangle by about ¾ inch thick (15¼ cm by 10 cm by 2
cm thick). Using a well-floured 2-inch (5 cm) scone cutter (biscuit cutter), stamp out without twisting six 2-inch (5 cm) rounds, gently reform the scraps into another ¾ inch (2 cm) layer and cut two more scones (these two scones will not raise as well as the others since the extra handling will slightly toughen the dough). Or use a well-floured sharp knife to form squares or wedges as you desire.

7. Place the rounds just touching on a baking dish if you wish to have soft-sided scones or place the rounds spaced widely apart on the baking dish if you wish to have crisp-sided scones. Glaze the tops with milk if you want a golden colour on your scones or lightly flour if you want a more traditional look to your scones.

8. Bake in the preheated very hot oven for about 10 minutes (check at 8 minutes since home ovens at these high temperatures are very unreliable) until the scones are well risen and are lightly coloured on the tops. The scones are ready when the sides are set.

9. Immediately place onto cooling rack to stop the cooking process, serve while still warm.


BB Biscuits (aka Blueberry-Banana Biscuits)
Adapted from Audax Artifex

Servings: about four large biscuits
Can be doubled

Ingredients
1 cup all-purpose flour
2 teaspoons fresh baking powder
¼ teaspoon salt
1 tablespoons frozen grated butter 
1 medium ripe banana, peeled and mashed
1/2 cup fresh blueberries, dusted in flour
Approximately 1/4 cup cold milk
Optional 1 tablespoon milk, for glazing the tops of the biscuits
Optional 1 tablespoon sugar, for sprinkling the tops of the biscuits


Directions
1. Preheat oven to very hot 475°F.

2. Mix dry ingredients into a large bowl.

3. Rub the frozen grated butter into the dry ingredients until it resembles very coarse bread crumbs with some pea-sized pieces if you want flaky scones or until it resembles coarse beach sand if you want tender scones.

4. Add the mashed banana and nearly all of the liquid into the rubbed-in flour/butter mixture and mix until it just forms a sticky dough (add the remaining liquid if needed). The wetter the dough the lighter the scones (biscuits) will be!

5. Turn the dough out onto a lightly floured board, lightly flour the top of the dough. Gradually knead the blueberries into the layers as to not squish them, but evenly distribute through the dough. To achieve 
an even homogeneous crumb to your scones knead very gently about 4 or 5 times (do not press too firmly) the dough until it is smooth. To achieve a layered effect in your scones knead very gently once (do not press too firmly) then fold and turn the kneaded dough about 3 or 4 times until the dough has formed a smooth texture. (Use a floured plastic scraper to help you knead and/or fold and turn the dough if you wish.)

6. Pat or roll out the dough into a 6 inch by 4 inch circle by about ¾ inch thick. Using a well-floured sharp knife, form squares or wedges as you desire.

7. Place the rounds just touching on a 6 inch greased cast iron pan or baking dish if you wish to have soft-sided scones or place the rounds spaced widely apart on the baking dish if you wish to have crisp-sided scones. Glaze the tops with milk if you want a golden color on your scones or lightly flour if you want a more traditional look to your scones. Sprinkle the tops with sugar.

8. Bake in the preheated very hot oven for about 10 minutes (check at 8 minutes, just in case) until the scones are well risen and are lightly colored on the tops. The scones are ready when the sides are set.

9. Immediately place onto cooling rack to stop the cooking process, serve while still warm.

Crepes with Caramelized Banana or Blueberry Syrup

Tuesday, June 14, 2011

I love making breakfast. Sometimes I wish I could go to work an hour later just so I could make a really good breakfast in the morning. I mean, let's be honest here - fruit, caramel, syrup, yogurt a tall glass of milk. Oh my goodness.

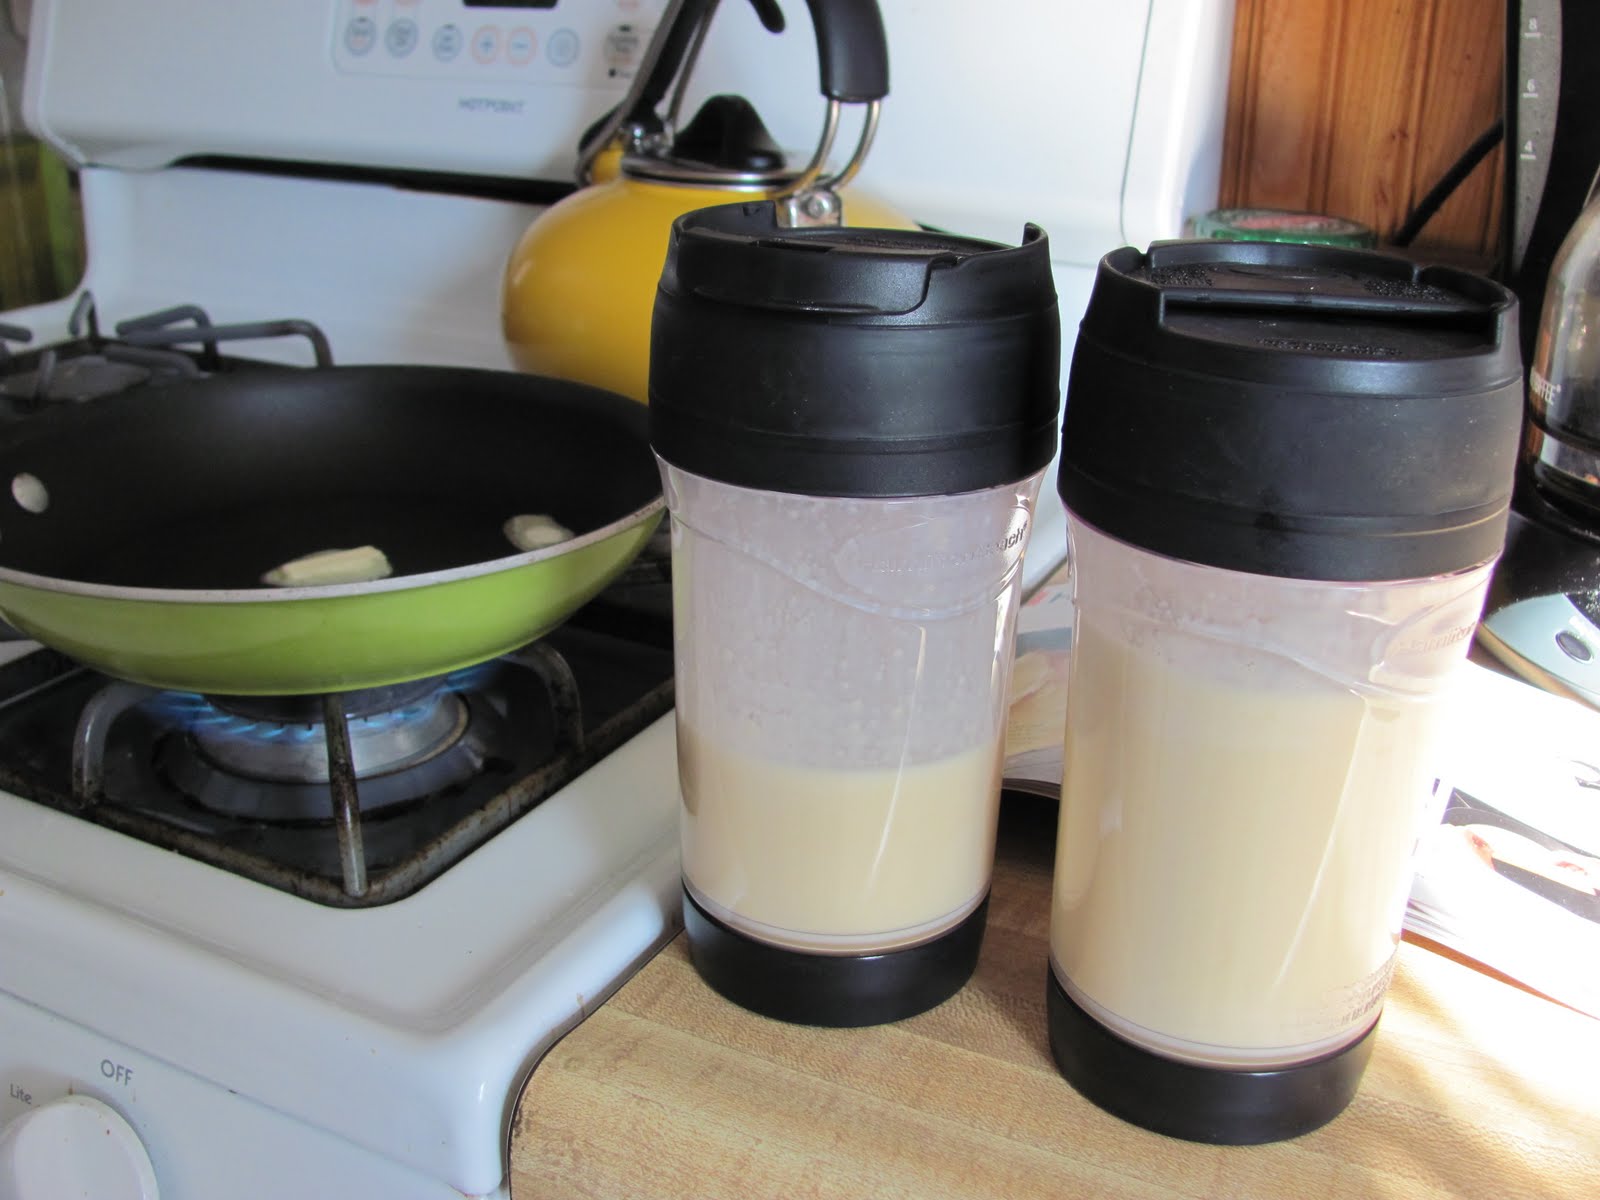
I made these crepes while I was still living in Massachusetts for my sisters and mom. They came for a weekend visit and I knew these were going to be the perfect breakfast. The recipe comes from Martha Stewart and is the easiest thing you could possibly make - mostly because you mix the batter the night before. If you have a nice blender (or one that works, anyways) - this recipe is a cinch. Try it out and let me know what flavor combinations you used - because you can never go wrong with this delicious dessert.


Simply heat up 1/2 cup of sugar and 1-2 cups of fresh blueberries for a homemade blueberry syrup. Fill the crepe with vanilla Greek yogurt.
Caramelized bananas with honey and Nutella. A dream in your mouth.
Have your batter in easy-pour containers so you can move quickly.
The key is to keep the crepes thin - use little batter and evenly swirl around the pan.
Perfect.
I think I ate at least two of these.

My Very Own Cinnamon Raisin Scones (with some help, of course)

Thursday, April 7, 2011


I've literally been wanting to make scones for the past 2-3 years. Literally. There are so many different variations and possibilities, that I have a pile of about 15 different scone recipes waiting to be tested. And heck, who doesn't like a warmed-up scone for breakfast every day? (Am I starting to sound crazy? It's ok - I can't see you.)

Lucky for my husband, he woke up one morning to fresh scones coming hot out of the oven. If he liked coffee, that would have been ready too - but I pretty much cleaned the pot out by this point. He was hooked, and told me that I could make these again - if I felt like it.

What flavor combinations would you like to test out in a scone or muffin? Inspire me!


Cinnamon Raisin Scones
Adapted from The America's Test Kitchen Family Cookbook - Revised Edition

Makes 8 scones

1 1/2 cups quick oats
1/4 cup whole milk
1/4 cup heavy cream
1 large egg
1 1/2 cups all-purpose flour
1/3 cup sugar
1 Tablespoon decorating sugar (or regular sugar will do) for sprinkling on the scones
2 teaspoons baking powder
1/2 teaspoon salt
1 cup raisins
10 Tablespoons (1 1/4 sticks) unsalted butter, cut into 1/4-inch cubes and chilled

Adjust an oven rack to the middle position and heat the oven to 375*F. Spread the oats out over a baking sheet and toast in the oven until lightly browned, about 8 minutes. Let cool on a wire rack. Increase the oven temperature to 450*F. When the oats are cooled, measure out 2 tablespoons (for dusting the counter) and set aside. Line a second baking sheet with parchment paper.

Whisk the milk, cream, and egg together in a large measuring cup. Remove 1 tablespoon to a small bowl and reserve for glazing.

Pulse the flour, sugars, baking powder, and salt in a food processor until combined, about 4 pulses. Scatter the butter evenly over the top and process until the mixture resembles course cornmeal, 12-14 pulses.  

Transfer the mixture to a medium bowl and stir in the cooled oats and raisins. Fold in the milk mixture using a rubber spatula until large clumps form. Gently knead the mixture in the bowl with your hands until the dough forms a cohesive mass.

Dust the counter with half of the reserved oats. Turn the dough out onto the counter and dust the top with the remaining oats. Gently pat the dough into a -inch circle about 1 inch thick. Cut the dough into 8 wedges and place on the prepared baking sheet. Brush with the reserved milk mixture and sprinkle with 1 tablespoon sugar.

Bake until golden brown, 12-15 minutes. Let the scones cool on the baking sheet for 10 minutes. Serve warm or transfer to a wire rack and let cool completely, about 30 minutes.


Filled Meringue Coffee Cake

Tuesday, March 29, 2011


I apologize for my absence from the blogging world for the past two months. My husband and I have moved halfway across the country - again. Closer to home, but still in foreign land. We are now living in cheese-country Wisconsin. I went from small-scale artisanal cheese world to the next level up. Luckily for me, I'm obsessed with cheese - so it's totally fine with me. Expect more from me this spring and summer - as I have a whole new area to explore!

I have been craving cinnamon rolls for about two months now. As soon as I read this month's Daring Bakers challenge, I instantly knew what flavors I was going to try.  The March 2011 Daring Baker’s Challenge was hosted by Ria of Ria’s Collection and Jamie of Life’s a Feast. Ria and Jamie challenged The Daring Bakers to bake a yeasted Meringue Coffee Cake.

Luckily, I had nearly a full Sunday to hang out in the kitchen and watch dough rise - and my husband was working on taxes, so he didn't need my attention. It was a crisp sunny day, so the heat of the oven was welcoming. With the confirmation of my husband, I made two different fillings for my coffee cakes; cinnamon roll and peanut butter and jelly. The PB and J is cake is in the freezer until we finish devouring the cinnamon roll cake.

This is a fairly easy recipe (just time consuming). The more creative you are with the fillings, the more fun it gets. Just be sure to not over fill your dough, or it will come oozing out the ends. 


Cinnamon Roll-Filled Meringue Coffee Cake

Makes 2 round coffee cakes, each approximately 10 inches in diameter
The recipe can easily be halved to make one round coffee cake

Ingredients

For the yeast coffee cake dough:
4 cups (600 g / 1.5 lbs.) flour
¼ cup (55 g / 2 oz.) sugar
¾ teaspoon (5 g / ¼ oz.) salt
1 package (2 ¼ teaspoons / 7 g / less than an ounce) active dried yeast
¾ cup (180 ml / 6 fl. oz.) whole milk
¼ cup (60 ml / 2 fl. oz. water (doesn’t matter what temperature)
½ cup (135 g / 4.75 oz.) unsalted butter at room temperature
2 large eggs at room temperature

For the meringue:
3 large egg whites at room temperature
¼ teaspoon salt
½ teaspoon vanilla
½ cup sugar

For the filling:
Cinnamon Roll
1/2 cup packed dark brown sugar
3/4 cup chopped walnuts
2 T honey
1/2 stick (1/4 cup) cubed butter

Peanut Butter & Jelly
1/2 cup crunchy peanut butter
1/2 cup jam/jelly
3/4 cup chocolate chips

Egg wash: 1 beaten egg

Cocoa powder (optional) and confectioner’s sugar (powdered/icing sugar) for dusting cakes

Directions:

Prepare the dough:
In a large mixing bowl, combine 1 ½ cups (230 g) of the flour, the sugar, salt and yeast.

In a saucepan, combine the milk, water and butter and heat over medium heat until warm and the butter is just melted. 

With an electric mixer on low speed, gradually add the warm liquid to the flour/yeast mixture, beating until well blended. 

Increase mixer speed to medium and beat 2 minutes. Add the eggs and 1 cup (150 g) flour and beat for 2 more minutes.

Using a wooden spoon, stir in enough of the remaining flour to make a dough that holds together. Turn out onto a floured surface (use any of the 1 ½ cups of flour remaining) and knead the dough for 8 to 10 minutes until the dough is soft, smooth, sexy and elastic, keeping the work surface floured and adding extra flour as needed.

Place the dough in a lightly greased (I use vegetable oil) bowl, turning to coat all sides. Cover the bowl with plastic wrap and a kitchen towel and let rise until double in bulk, 45 – 60 minutes. The rising time will depend on the type of yeast you use.

Prepare your filling. In a small bowl, combine the cinnamon, sugar, nuts and butter for the filling if using. The honey will get sprinkled on before rolling the dough. For PB & J, combine peanut butter and jelly with a spoon. Sprinkle chocolate over the dough, last.

Once the dough has doubled, make the meringue:
In a clean mixing bowl – ideally a plastic or metal bowl so the egg whites adhere to the side (they slip on glass) and you don’t end up with liquid remaining in the bottom – beat the egg whites with the salt, first on low speed for 30 seconds, then increase to high and continue beating until foamy and opaque. Add the vanilla then start adding the ½ cup sugar, a tablespoon at a time as you beat, until very stiff, glossy peaks form.

Assemble the Coffee Cakes:

Line 2 baking/cookie sheets with parchment paper.

Punch down the dough and divide in half. On a lightly floured surface, working one piece of the dough at a time (keep the other half of the dough wrapped in plastic), roll out the dough into a 20 x 10-inch (about 51 x 25 ½ cm) rectangle. Spread half of the meringue evenly over the rectangle up to about 1/2-inch (3/4 cm) from the edges. Sprinkle half of your filling of choice evenly over the meringue (ex: half of the cinnamon-sugar followed by half the chopped nuts and half of the chocolate chips/chopped chocolate).


Now, roll up the dough jellyroll style, from the long side. Pinch the seam closed to seal. Very carefully transfer the filled log to one of the lined cookie sheets, seam side down. Bring the ends of the log around and seal the ends together, forming a ring, tucking one end into the other and pinching to seal.

Using kitchen scissors or a sharp knife (although scissors are easier), make cuts along the outside edge at 1-inch (2 ½ cm) intervals. Make them as shallow or as deep as desired but don’t be afraid to cut deep into the ring. Repeat with the remaining dough, meringue and fillings.

Cover the 2 coffee cakes with plastic wrap and allow them to rise again for 45 to 60 minutes.

Preheat the oven to 350°F (180°C).

Brush the tops of the coffee cakes with the egg wash. Bake in the preheated oven for 25 to 30 minutes until risen and golden brown. The dough should sound hollow when tapped.

Remove from the oven and slide the parchment paper off the cookie sheets onto the table. Very gently loosen the coffee cakes from the paper with a large spatula and carefully slide the cakes off onto cooling racks. Allow to cool.

Just before serving, dust the tops of the coffee cakes with confectioner’s sugar as well as cocoa powder if using chocolate in the filling. These are best eaten fresh, the same day or the next day.


Panna Cotta & Florentine Cookies

Sunday, February 27, 2011

The February 2011 Daring Bakers’ challenge was hosted by Mallory from A Sofa in the Kitchen. She chose to challenge everyone to make Panna Cotta from a Giada De Laurentiis recipe and Nestle Florentine Cookies.

I was excited to make Panna Cotta for the first time - as I've seen it all over the blogging world lately. I had intended on making it for the dessert of my next round of the Foodbuzz's blogging contest, but I didn't make it that far. Waa Waaap.

The cookies though? To die for... that is, if you love butter.

This is what happens when you use too much dough.
Nestle Florentine Cookies

Recipe from the cookbook “Nestle Classic Recipes”, and their website.

Ingredients:
2/3 cup (160 ml) (150 gm) (5.3 oz) unsalted butter
2 cups (480 ml) (160 gm) (5 2/3 oz) quick oats
1 cup (240 ml) (230 gm) (8 oz) granulated sugar
2/3 cup (160 ml) (95 gm) (3⅓ oz) plain (all purpose) flour
1/4 cup (60 ml) dark corn syrup
1/4 cup (60 ml) whole milk
1 tsp (5 ml) vanilla extract
pinch of salt
1½ cups (360 ml) (250 gm) (9 oz) dark or milk chocolate

Directions:
Preheat oven to moderately hot 375°F (190°C) (gas mark 5). Prepare your baking sheet with silpat or parchment paper.

   1. Melt butter in a medium saucepan, then remove from the heat.
   2. To the melted butter add oats, sugar, flour, corn syrup, milk, vanilla, and salt. Mix well. Drop a tablespoon full, three inches (75 mm) apart, onto your prepared baking sheet. Flatten slightly with the back of your tablespoon, or use a spatula.
   3. Bake in preheated oven for 6-8 minutes, until cookies are golden brown. Cool completely on the baking sheets.
   4. While the cookies are cooling melt your chocolate until smooth either in the microwave (1 1/2 minutes), or stovetop (in a double boiler, or a bowl that fits atop a saucepan filled with a bit of water, being sure the water doesn't touch the bottom of the bowl).
   5. Peel the cookies from the silpat or parchment and place face down on a wire rack set over a sheet of wax/parchment paper (to keep counters clean).
   6. Spread a tablespoon of chocolate on the bottom/flat side of your cookie, sandwiching another (flat end) cookie atop the chocolate.

This recipe will make about 2 1/2 - 3 dozen sandwiched Florentine cookies. You can also choose not to sandwich yours, in which case, drizzle the tops with chocolate (over your wax paper). {I chose to do neither... simply because I didn't have enough time in the day!}


Giada's Vanilla Panna Cotta

Ingredients
1 cup (240 ml) whole milk
1 tablespoon (one packet) (15 ml) (7 gm) (¼ oz) unflavored powdered gelatin
3 cups (720 ml) whipping cream (30+% butterfat)
1/3 cup (80 ml) honey
1 tablespoon (15 ml) (15 gm) (½ oz) granulated sugar
pinch of salt

Directions:

   1. Pour the milk into a bowl or pot and sprinkle gelatin evenly and thinly over the milk (make sure the bowl/pot is cold by placing the bowl/pot in the refrigerator for a few minutes before you start making the Panna Cotta). Let stand for 5 minutes to soften the gelatin.
   2. Pour the milk into the saucepan/pot and place over medium heat on the stove. Heat this mixture until it is hot, but not boiling, about five minutes. (I whisk it a few times at this stage).
   3. Next, add the cream, honey, sugar, and pinch of salt. Making sure the mixture doesn't boil, continue to heat and stir occasionally until the sugar and honey have dissolved 5-7 minutes.
   4. Remove from heat, allow it to sit for a few minutes to cool slightly. Then pour into the glass or ramekin.
   5. Refrigerate at least 6 hours or overnight. Add garnishes and serve.


{Mine didn't get quite as solid as I was expecting, but we enjoyed them a lot. It's a great treat for breakfast and they claim it has a third of the calories as creme brulee.}


Sunday Brunch: Cornbread Pudding

Sunday, January 16, 2011


I love this cornbread pudding recipe. It's from a really old Everyday Food magazine (2004) and it just hits the spot.  Surprisingly, the ingredients say you can use store-bought cornbread (this is Martha, guys) but it's too easy to just whip some up yourself. Simply, follow the directions on the side of a cornmeal can for one batch of cornbread. Note - that I said one batch. If you were to follow Martha's recipe, you will need two batches of cornbread. I've found that one (and cutting the recipe in half), tends to be enough to cover about 3 breakfasts for my husband and I. We typically pour maple syrup or honey on top. It's warm and delicious.

Check out her recipe here - and remember to halve it if you're only making one batch of cornbread!